Heavy snow can cause a lot of problems for your home if your roof isn’t ready. Preparing your roof for heavy snow is an important task that can save you from expensive repairs later. With some simple steps, you can make sure your roof is in top shape to handle the snow.
Inspecting and Cleaning Gutters
Keeping your gutters clear is crucial for preparing your roof for heavy snow. Clogged gutters can cause ice dams and damage your roof, walls, and foundation. Here are some steps for inspecting and cleaning your gutters:
1. Check for Debris: Look for leaves, twigs, and other debris in your gutters. These can block water flow and freeze, causing ice dams. Use a small garden trowel to scoop out the debris.
2. Flush with Water: After removing the debris, use a garden hose to flush the gutters. This helps to clear out any remaining dirt and ensures snowmelt can flow freely.
3. Inspect for Damage: While cleaning, check for signs of damage, such as cracks or sagging sections. Repair or replace damaged gutters to avoid leaks.
4. Ensure Proper Attachment: Make sure the gutters are securely attached to your home. Loose gutters can cause water to freeze over and damage your property.
By regularly inspecting and cleaning your gutters, you can prevent snow-related damage and keep your roof in good condition during heavy snow.
Checking for Roof Damage
Before the heavy snow starts, it’s important to inspect your roof for any signs of damage. Even minor issues can lead to big problems when it snows heavily. Here’s what to look for:
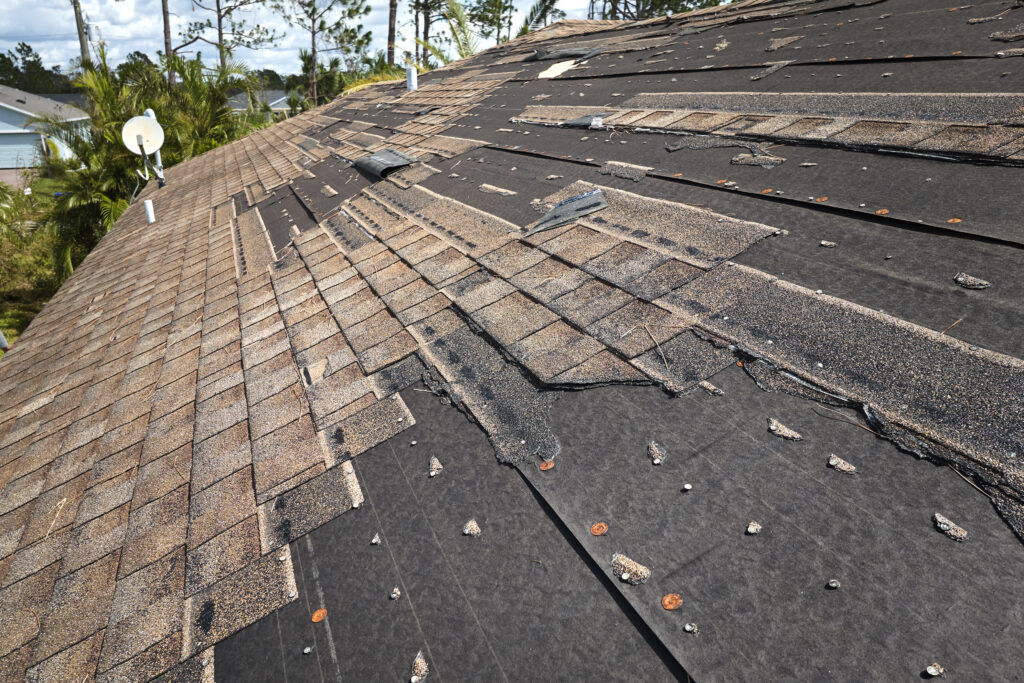
1. Missing or Damaged Shingles: Check for shingles that are missing, cracked, or curling. These can let moisture seep into your home. Replace any damaged shingles you find.
2. Loose Flashing: Flashing around chimneys, vents, and skylights can become loose or damaged. Make sure the flashing is firmly in place to prevent leaks.
3. Look for Leaks: Go into your attic and look for signs of moisture damage, such as stains or damp spots on the ceiling or walls. Any sign of moisture can indicate a leak.
4. Check the Roof’s Surface: Examine the overall surface of your roof for any signs of wear and tear. Look for any soft spots or areas that appear to dip, as these could be signs of moisture damage or rot.
Fixing these issues before the snow hits can save you a lot of trouble. You can either do the repairs yourself or hire a professional for bigger problems. Regular roof inspections help you catch and address potential issues early, keeping your home dry and safe.
Insulating and Protecting Vulnerable Areas
To prepare your roof for heavy snow, you should insulate and protect vulnerable areas where moisture can easily seep in. These areas include chimneys, vents, skylights, and joints. Here’s how to do it:
1. Inspect Flashing: Check the flashing around these areas. Flashing is the material used to seal and protect joints from moisture. If it’s loose or damaged, replace or repair it to prevent leaks.
2. Use Roof Sealant: Apply roof sealant or caulk around chimneys, vents, and skylights. Make sure to create a watertight seal to keep out moisture. This will help protect your roof from leaks during heavy snow.
3. Check Joints and Seams: Look at the joints where different sections of the roof meet. Use a sealant to ensure these areas are secure and watertight.
4. Install Waterproof Barriers: In particularly vulnerable areas, consider adding an extra layer of protection, such as installing waterproof barriers or membranes under shingles.
Taking these steps ensures that moisture can’t find its way into your home through susceptible spots. It’s a simple yet effective way to keep your roof resilient during heavy snow.
Ensuring Proper Attic Ventilation
Proper attic ventilation is key for a healthy roof, especially when preparing for heavy snow. Good ventilation helps regulate temperature and moisture levels, protecting your roof from the inside out. Here’s how to ensure your attic has good ventilation:
1. Check Existing Vents: Inspect your attic’s current vents, including ridge vents, soffit vents, and gable vents. Make sure they are not blocked by insulation, debris, or other materials.
2. Look for Moisture: Check for signs of moisture or mold in the attic. This can indicate poor ventilation. Dark spots, mold growth, or a musty smell are signs you need to improve air circulation.
3. Improve Airflow: If your attic doesn’t have enough ventilation, consider installing additional vents. Ridge vents or solar-powered attic fans can help increase airflow and remove excess moisture.
4. Ensure Even Distribution: Make sure that ventilation is evenly distributed throughout the attic. Balanced intake and exhaust vents help air circulate properly, reducing moisture and heat buildup.
By ensuring proper attic ventilation, you prevent moisture buildup that can damage your roof from the inside. This keeps your roof strong and ready to handle the stress of heavy snow.
Conclusion
Preparing your roof for heavy snow is essential for protecting your home. By inspecting and cleaning gutters, you prevent ice dams and damage. Checking for roof damage allows you to fix problems before they become major issues. Insulating and protecting vulnerable areas keeps moisture from seeping into your home, and ensuring proper attic ventilation helps regulate moisture and temperature.
Taking these steps will help keep your home safe and dry, even during the heaviest snowfalls. Spotting potential roof leaks early and implementing regular maintenance practices can save you from costly repairs down the line. For professional help and expert advice, contact Brubaker Bros. LLC’s licensed roofing contractors. Let us assist you in keeping your roof in excellent condition all year round.


